Add Liquidity
This section shows how to provide liquidity to UtilityX.
Open the Add Liquidity page
On the main menu bar at the top left of the page, move your mouse over the Trade drop-down menu to expand it.
Then, click on the AMM Liquidity option:

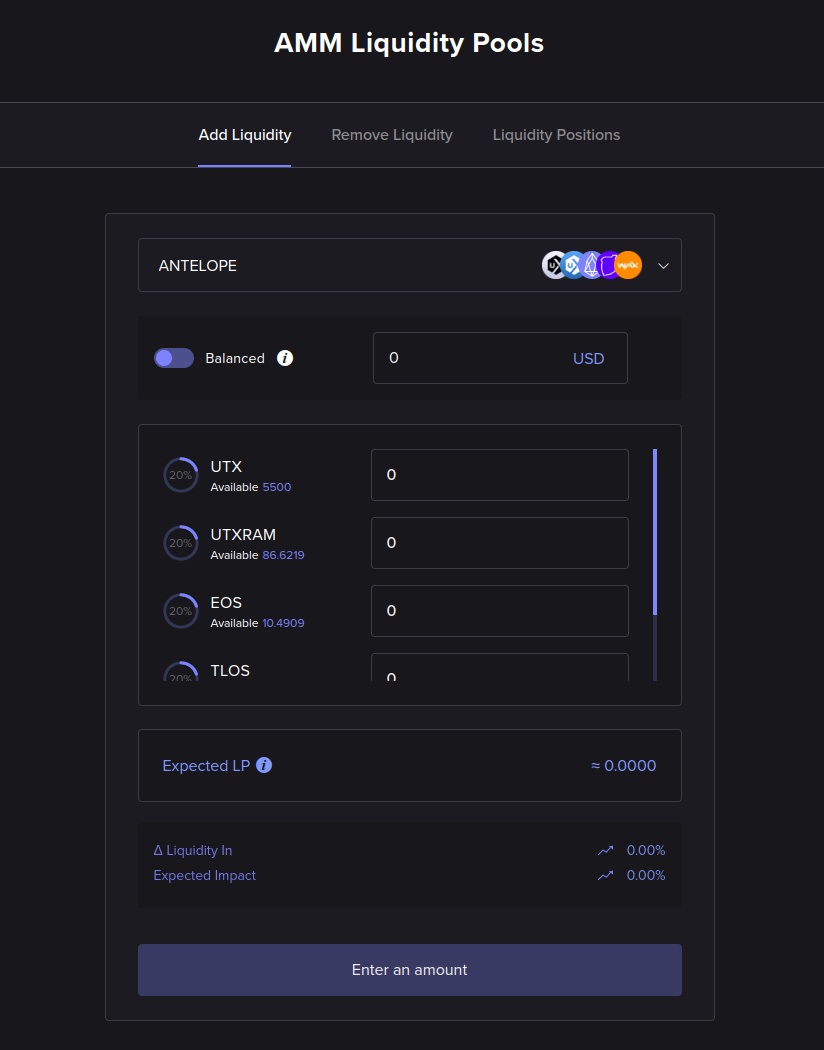
That should automatically open the Add Liquidity tab on the AMM Liquidity page:
Select pool
At the top of the Add Liquidity form, you will select the AMM pool to which you wish to add liquidity.
Each pool supports a different set of tokens. You need to have a non-zero quantity of at least one of the tokens in a pool to be able to add liquidity to it.
Balanced vs. unbalanced
After selecting a pool, you will need to decide whether to add balanced or unbalanced liquidity.
By default, the Add Liquidity form will operate in balanced mode:

In balanced mode, you need to have a sufficient quantity of all the tokens that the pool supports and you will be depositing to the pool an equivalent amount of trade value for each token. To do that, you will simply choose an amount of trade value (in this case, in USD) to deposit into the pool, as shown in the figure above, and UtilityX will calculate for you every token amount that you will need.
If you click on the toggle button to the left of balanced, you will switch to unbalanced mode:

In unbalanced mode, you can choose the amount of each token you deposit into the pool. That is the most convenient way to provide liquidity (for example, you can deposit some amount of only one token), but it will incur extra fees.
Add liquidity (balanced)
In the example below, we are adding 5 USD of balanced liquidity to the antelope pool that has 5 tokens:
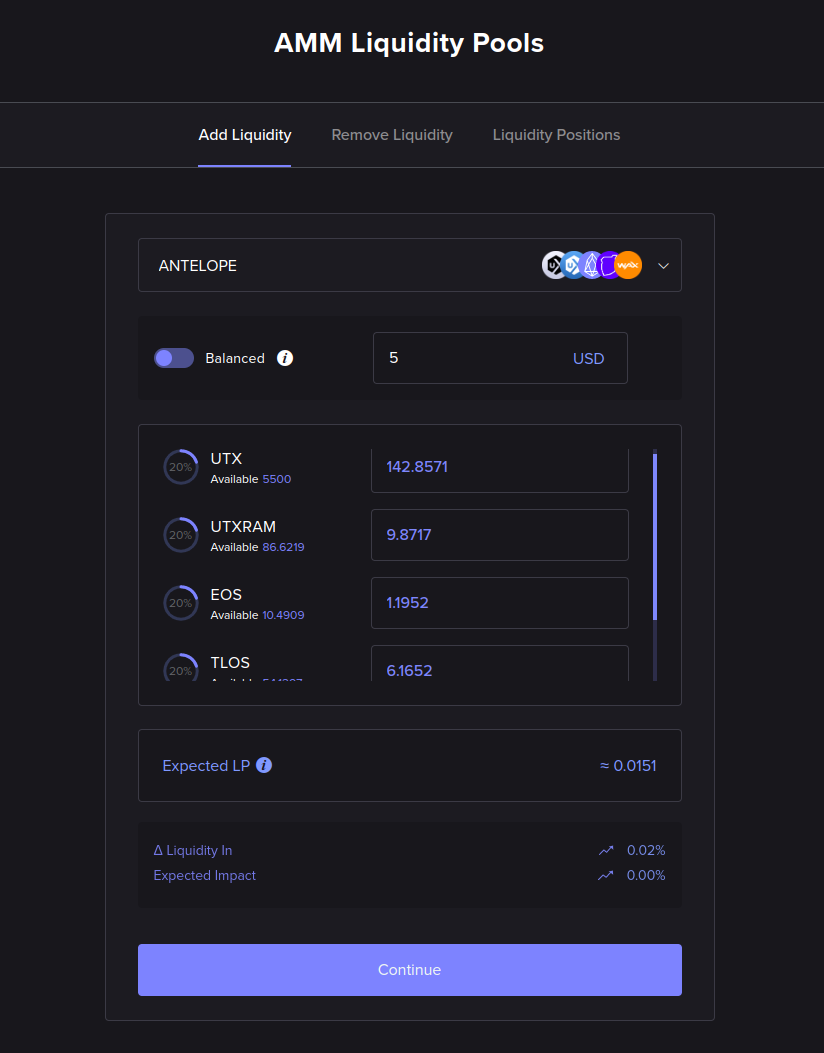
In the figure above, each one of the automatically-computed five token quantities in this sample pool is worth 1 USD (20% of 5 USD) given current token prices at the time (the WAX sample token does not fit in the screenshot, unfortunately, but you would be able to use the scroll bar inside the token list in the form to see it).
Clicking Continue will show a confirmation dialog:
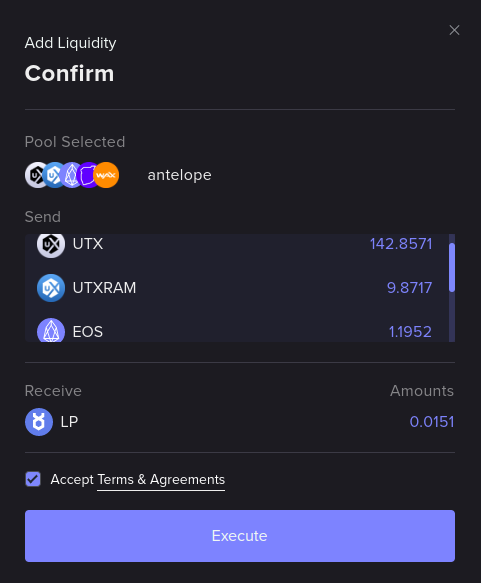
Clicking Execute will prompt you to sign a transaction on your Web3 wallet. Once you do so, the following progress indicator on the bottom right will show up:

Once the operation is complete, an information box will appear in the bottom right:

You can click it to view the report (or search for the report on the order history menu on the top right):
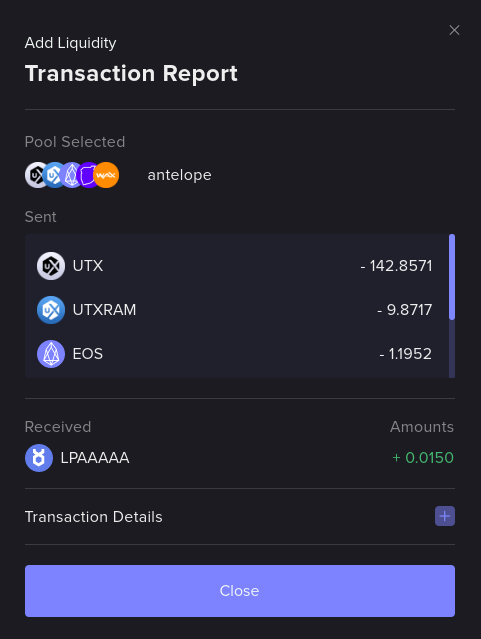
In the above balanced liquidity add example, we traded approximately 5 USD worth of five different tokens (in the antelope pool of the example, those were UTX, UTXRAM, EOS, TLOS and WAX tokens) for 0.0150 LPAAAAA, which are tokenized shares on the pool. This amount is less than the 0.0151 LPAAAAA that was estimated (see Expected LP in the example Add Liquidity form above) since that estimate does not include fees.
Add liquidity (unbalanced)
Adding unbalanced liquidity will require you to choose an exact quantity of each token that you wish to deposit into the pool in exchange for shares of that pool.
In the example below, the user is simply depositing 500 UTX into the pool and letting UtilityX do the work of rebalancing the token pool:
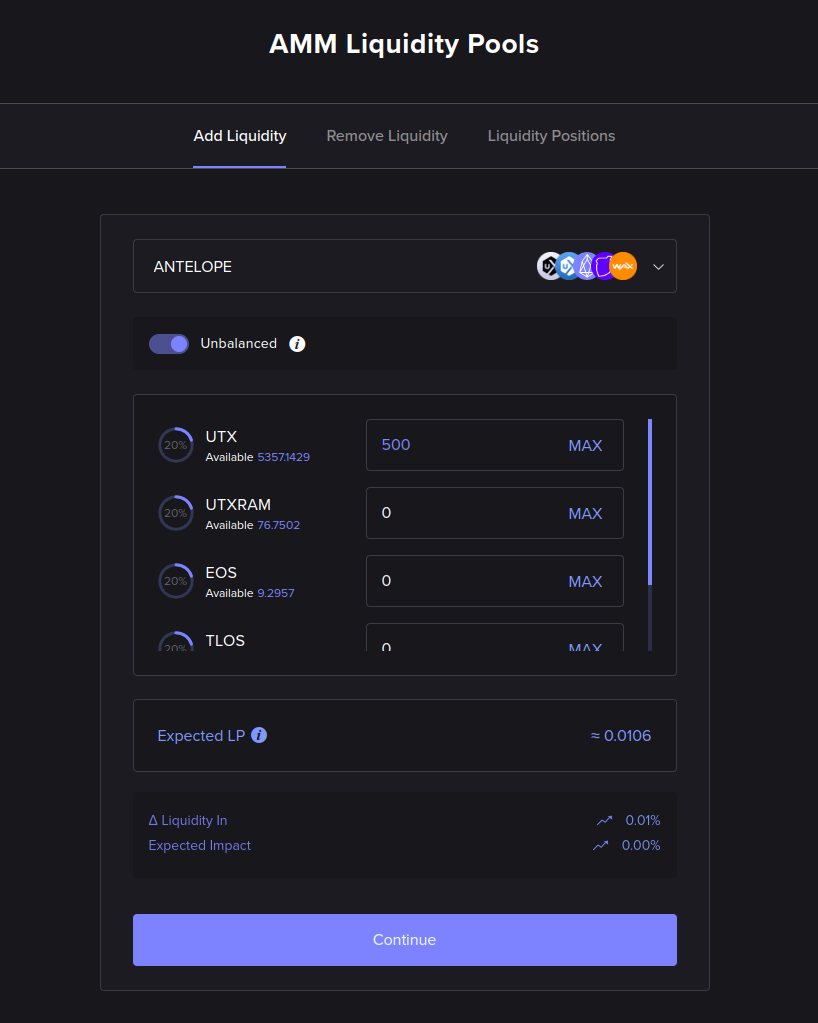
Adding unbalanced liquidity is, otherwise, identical to adding balanced liquidity. Please refer to the previous section (adding balanced liquidity) if you need help with the next steps.