Swap
We will now perform our first trade, which will be a simple swap between a quantity of a token that we have, and some equivalent quantity of a token that we want to have in exchange for it.
Open the Swap page
On the main menu bar at the top left of the page, move your mouse over the Trade drop-down menu to expand it.
Then, click on the AMM Swap option:

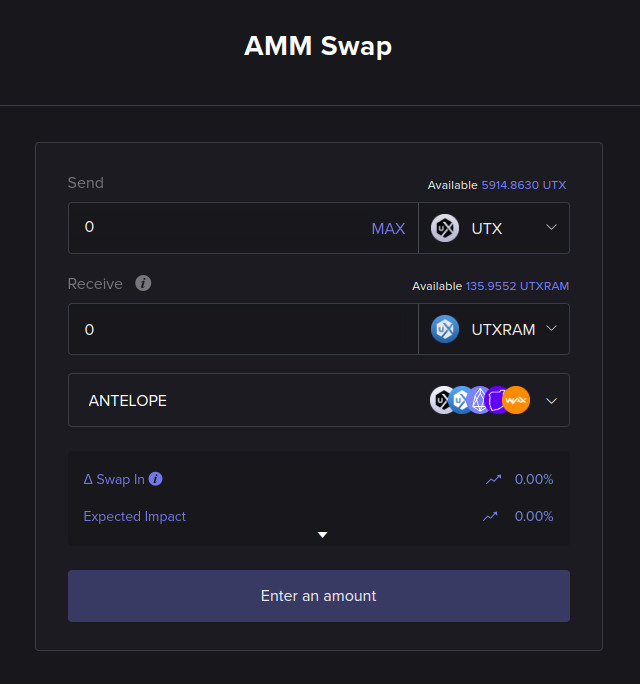
This should open the AMM Swap page, which will allow us to perform our trade:

Select liquidity pool
All AMM operations on UtilityX execute against a liquidity pool, or just pool for short. AMM pools are essentially containers of arbitrary quantities of tokens provided by liquidity providers.
If multiple pools are available, you can check them out using the pool selection drop-down list box. In the example screen image above, we will use the antelope pool that contains the UTX, UTXRAM, EOS, TLOS and WAX tokens.
After you have settled on a liquidity pool to use, it is time to select the tokens.
Select tokens
You now have to select the token you want to send to the pool (sell) and the token you want to receive from the pool in return (buy).
In this example, we will assume you have some quantity of liquid UTX tokens in your account that are available for a trade, but you can use any token supported by the liquidity pool you have selected.
In the Send section, click on the drop-down box at the right to select the UTX token.
Then, in the Receive section, click on the drop-down box at the right to select the UTXRAM token.
Your AMM Swap page should now look like this:
We have now determined that we want to send some quantity of UTX tokens and receive a quantity of UTXRAM tokens in return. Now we have to select the token amounts.
Select amount to send
To the right of the Send area, you can see the amount of the selected token you have available to send. The figure above shows that we have 5914.8630 UTX available to send from our logged-in blockchain account.
Now, in the Send area, enter any available amount that you are willing to trade in. In our example, we will sell 150 UTX to the AMM pool.
After you finish entering your amount, click on the amount edit box on the Receive area, and the platform should automatically compute the estimated amount of tokens to receive in return from the pool:
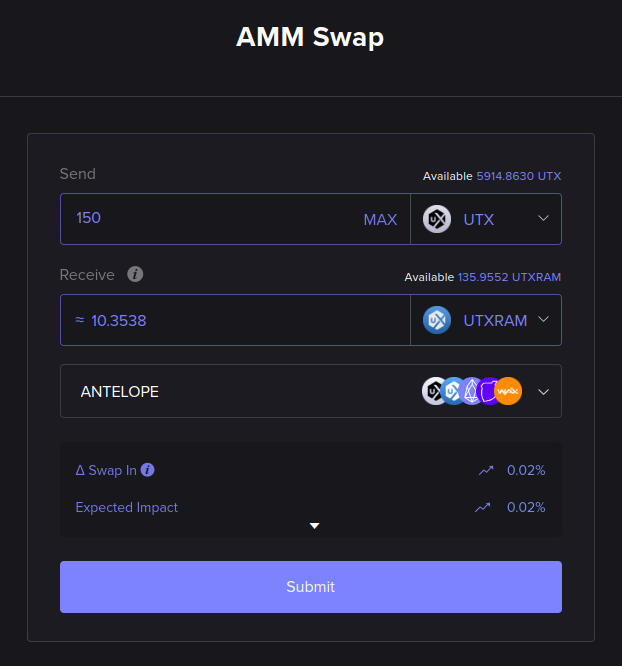
At this point, the button at the bottom of the form will be clickable and change its text to Submit, signaling that the form is complete and that we are ready to execute the token swap on the blockchain.
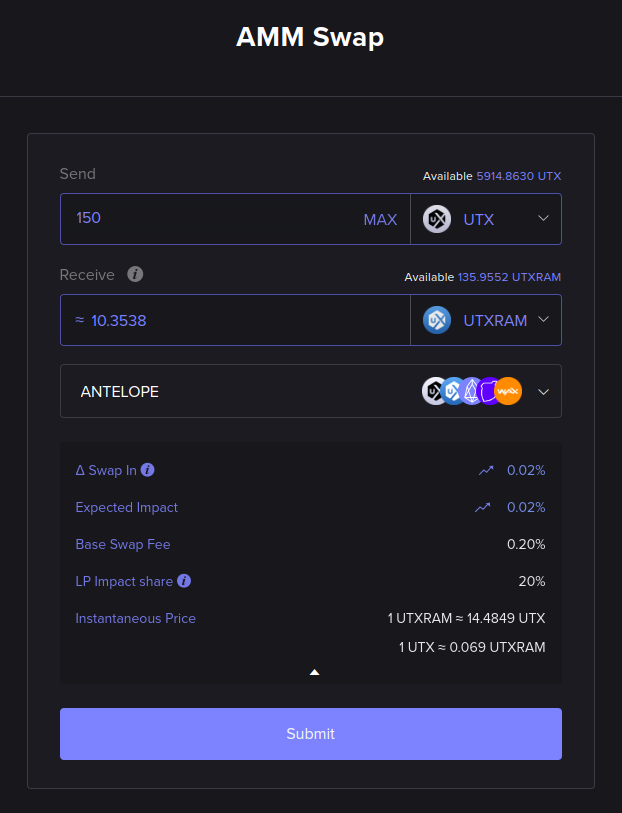
Before we finish the swap, click on the small white downwards-pointing arrow just above the Submit button. That will allow you to check more information pertaining to your swap quote:
Execute swap
When ready to perform the swap, click the Submit button at the bottom of the AMM Swap form.
A confirmation pop-up window will appear:
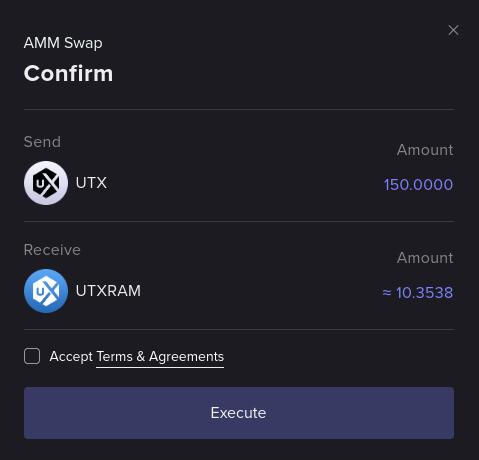
You must check the Accept Terms & Agreements checkbox; click the link to read the Terms & Agreements.
After you have accepted the terms, click on Execute. That will create a blockchain transaction you must sign using your Web3 wallet. The process for approving and signing the transaction will depend on the blockchain and wallet software that you are using. Usually, this means your wallet will pop up a window on your computer with information regarding the transaction to be signed and a button you must click to approve the transaction.
Once you have approved and signed the transaction with your Web3 wallet, the Execute button should show a spinning progress indicator for a while, until your swap order is successfully queued for execution by the blockchain.
Await swap completion
When the swap is in progress, the following information box should pop up on the bottom-right of the screen:

Once the swap is completed you should see the following information box pop up:

That means the swap is completed, and we can now inspect the swap report.
Check swap report
All UtilityX trades generate reports. To open the available reports on an order, first, click on the order history menu icon at the top right of the screen:

Your most recent trades should then be listed, and it should look something like this:
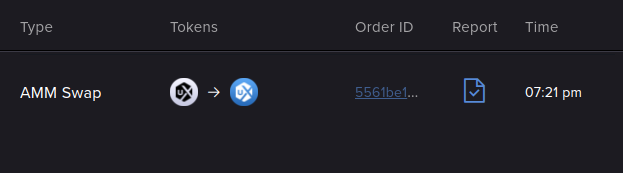
In the above trade history entry, we can see our request to swap UTX for UTXRAM tokens. The blue icon in the Report column is a link, and by clicking on it, you can access the detailed report for the executed order:
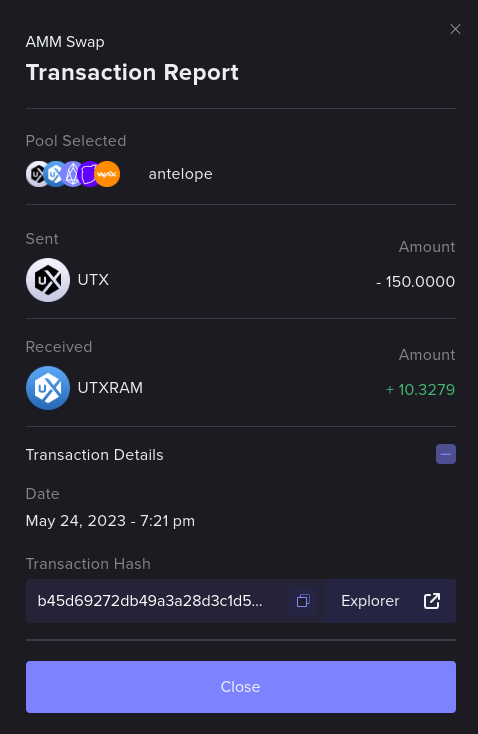
The transaction report above shows that we have successfully sent 150 UTX to the antelope pool and that we have received 10.3279 UTXRAM from the pool in return.
Congratulations, you have executed your first UtilityX AMM Swap!