Ethereum & Metamask
First things first!
If you are an Ethereum network user, with ETH or USDT tokens in your native Ethereum wallet, and you use the Metamask wallet, you are in luck! UtilityX supports Metamask and Ethereum wallets directly!
If you are not an Ethereum & Metamask user, no worries! Please skip to the next chapter.
How is this possible?
If you already have Metamask installed and configured with a funded Ethereum account with ETH (and perhaps also USDT) tokens, you have what you need to create a native account on the UX Network. And you will also be able to control that account through Metamask as well!
Yes, you read it right! You will create a native account on the UX Network using Metamask, paying for it with some of your Ethereum account's balance, and after that, you will be able to keep using Metamask wallet to control your UX Network account!
That is, you can use UtilityX, with a UX Network account, directly from Metamask, without ever needing an Antelope wallet (such as Anchor).
That is possible because your Metamask is able to actually switch to the Ethereum-compatible UX Network, which will show up on the Metamask interface as an Ethereum-compatible network configuration. To achieve this connection, Metamask is instructed to use a gateway service that is operated by the UtilityX platform, that converts access to the native UX Network to a format that Metamask (otherwise an Ethereum network wallet) can understand. So you can say that you can quite literally connect Metamask to the UX Network!
And there's more: you will also be able to import your UX Network account, which you created through Metamask, to an Antelope wallet later if you want to, which will unlock all the advanced features of UtilityX for you. In other words, the Ethereum private key inside your Metamask that is used to control your UX Network account can be converted to a native UX Network private key and imported to a UX Network compatible wallet (such as Anchor).
NOTE: Support for directly importing your Ethereum private key into the Anchor wallet is still a work in progress by the Anchor wallet team.
Create a UX Network account using an Ethereum wallet
First, we will create an account on the UX Network using your funded Ethereum account that is already configured on your Metamask installation.
Click on the Login / SignUp button on the top right:

On the menu that shows up, click on Create UX Account:

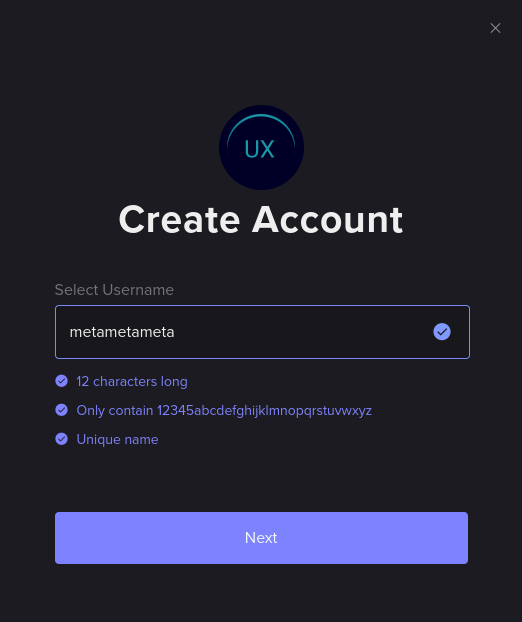
Choose a valid name for your account (12 characters, a-z, 1-5). It has to be a unique name, that is, a name that has not yet been taken on the UX Network. Once you have chosen a name that satisfies all requirements, click on Next:
A new window will show up. It tells you how many UTX tokens your new UX Network account will receive, already staked for you to CPU and NET account resources, and how many UTXRAM tokens your new UX Network account will receive, already converted (staked) to kilobytes of account memory (RAM).
CPU, NET, and RAM are native UX Network account resources. They need to be staked to your account for you to be able to submit a quota of free transactions to the network every day and to use smart contracts that consume some of your account's RAM.
The new window will also ask you to choose how you would like to pay for your new UX Network account. Under the Select Token / Chain drop-down menu, choose one of the options, ETH or USDT from the Ethereum network. In the example below, we are stating that we will be paying with ETH from our Ethereum account:
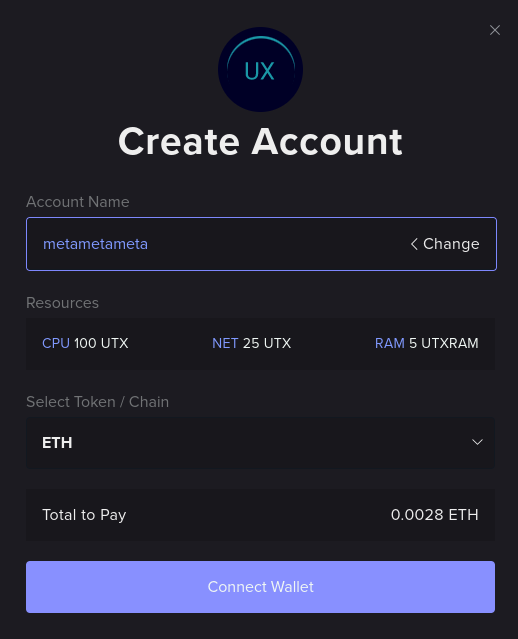
If all looks correct, click on Connect Wallet, which should pop up on your Metamask interface.
On Metamask, perform all the authorizations required, which will connect Metamask to UtilityX and prime everything for the final account creation decision and payment. The UtilityX interface should now change to acknowledge your connected Ethereum account:
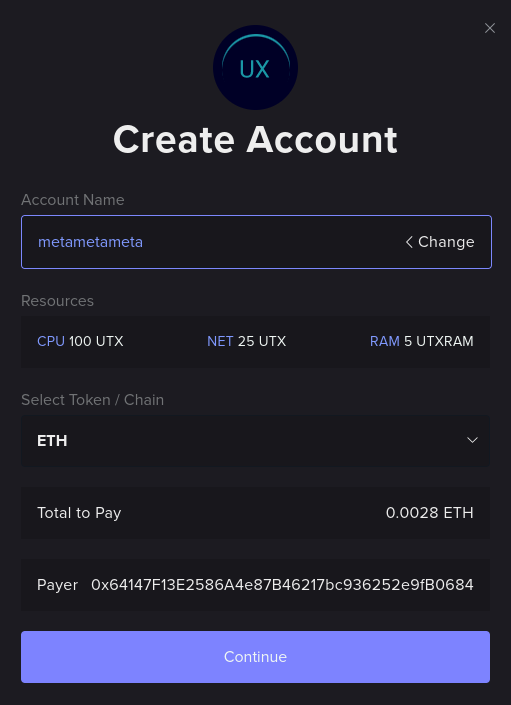
If the payer account and price tag look correct, click Continue. A final confirmation window should appear:
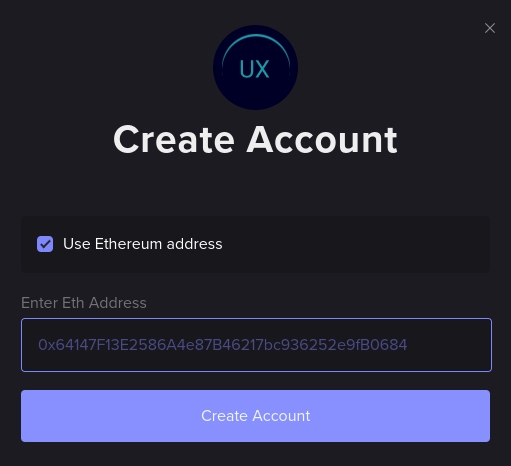
Now, click on Create Account, which should pop up your Metamask to sign the Ethereum transaction that will pay the UtilityX gateway and start the process of creating your UX Network account. In Metamask, see if the Ethereum network fees are acceptable to you, and if so, you can authorize the transaction.
Once you sign the payment transaction in Metamask, UtilityX should display a progress box in the bottom-right corner:

When the payment is confirmed by the gateway, it will create the UX Network account with the account name you have chosen. When UtilityX is done creating your account, you should see this in the bottom-right corner of UtilityX:

Congratulations! You now have a fully-functional UX Network account that you can also control using Metamask.
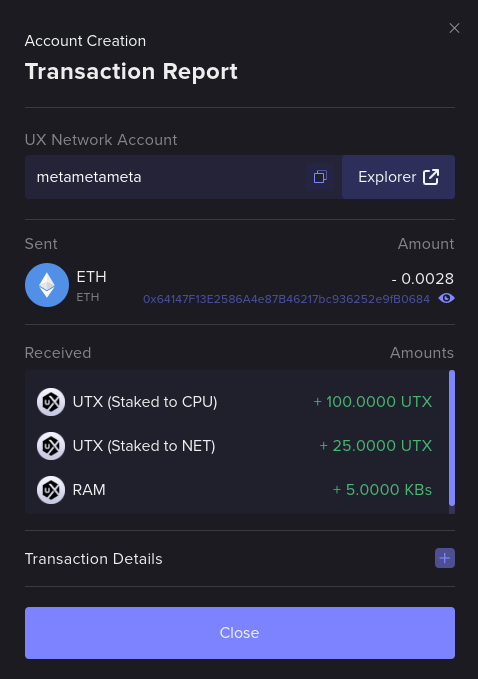
If you click on the account creation success notification (or on the icon at the top-right of UtilityX) you can see the detailed account creation report:
And UtilityX should display, in the top-right, that you are logged in with your new UX Network account (the account name displayed will be the one you have chosen):

Log back into UtilityX with Metamask
After creating your UX Network account with your Ethereum account and Metamask, you will be automatically logged in with Metamask on UtilityX.
If you log out, you will have to log back in using Metamask. To do this, click on the Login / SignUp button on the top right again:
This time, since you already have a UX Network account, choose Connect Metamask:

Two things can happen. Either it will automatically log you in, if UtilityX and Metamask are already in agreement, or Metamask will pop up and ask you to authorize the connection. If the latter, just authorize it in Metamask and it will be reconnected to UtilityX.
QuickSwap: acquire UX Network resources
Now that you have a fully-functional account on the UX Network, you may want to acquire some additional, liquid UX Network resource tokens, which you can use to, for example, perform swaps.
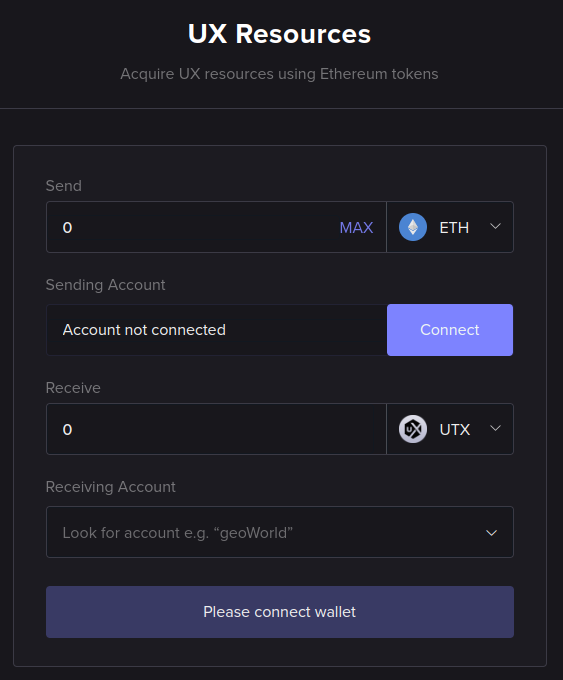
To acquire native UX Network resource tokens using tokens that you have on your Ethereum network account (such as ETH and USDT tokens on Ethereum), click on Resources at the top of UtilityX:

If UtilityX is not yet aware of your Ethereum account's address, it will state that the sending account is not connected, as shown below. If that's the case, click on Connect:
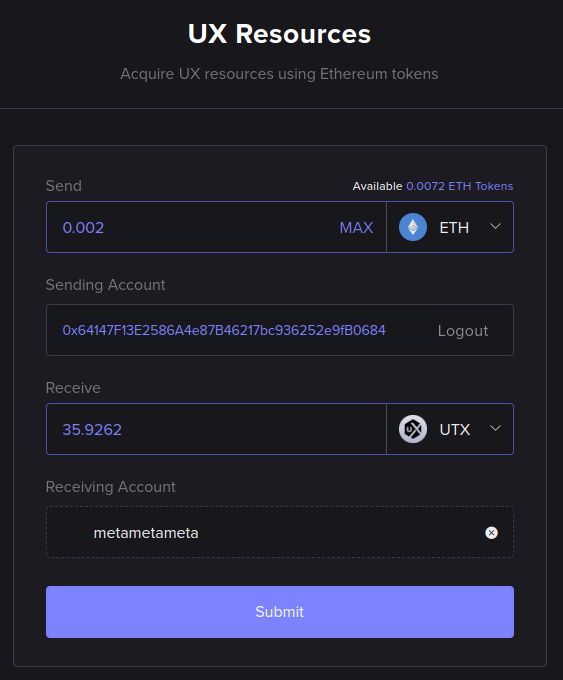
The Metamask interface should pop up, asking you to authorize the connection. After you authorize the wallet to connect to UtilityX, you should be able to specify an amount of an Ethereum native token to trade and an amount of UX Network native resource tokens to receive in return.
In the example below, we are asking to send 0.002 ETH (from your Ethereum wallet, specified in Sending Account) and to receive 35.9262 UTX (to your UX Network wallet, specified in Receiving Account):
If all looks correct, click on Submit, which should open a final confirmation dialog for a UtilityX QuickSwap from Ethereum tokens to UX Network tokens:
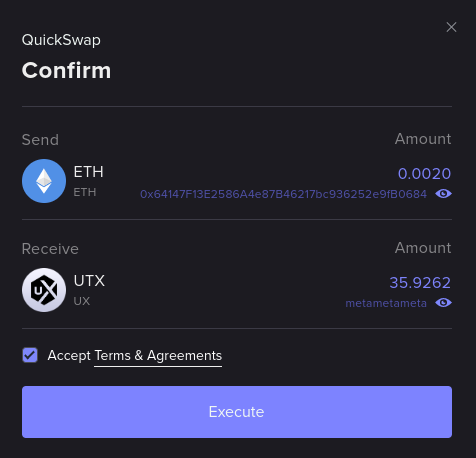
If all looks correct, accept the Terms & Agreements, and click on Execute, which starts the resource acquisition process.
Metamask should pop up and ask you to sign the transaction. If you sign the transaction on Metamask, UtilityX should start the acquisition process and display the following progress message in the bottom-right corner:

Once the acquisition process completes, the notification message changes to the following:

If you click on the completion message (or the report menu using the button on the top-right corner of UtilityX) you can find the report for the executed resource acquisition:
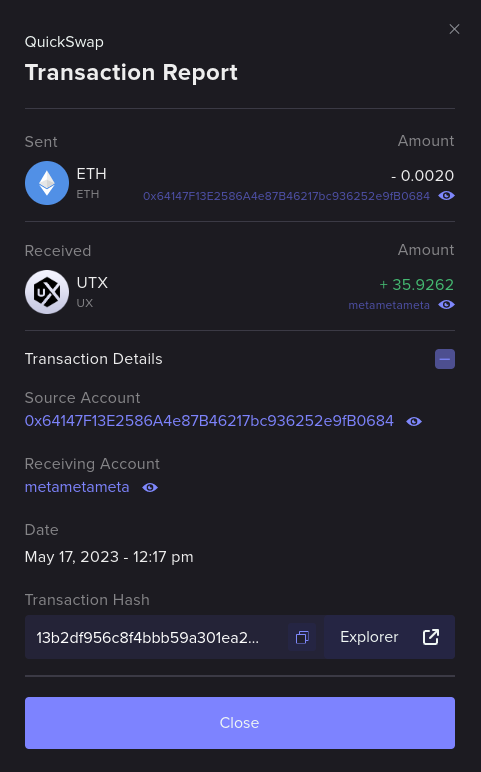
See UX Network tokens in Metamask
By default, Metamask will know how to display your balance of UTX tokens on your Metamask-controlled UX Account. As you add liquid quantities of other UX Network tokens to your account, you will need to add each one of these tokens to Metamask to be able to view their balance.
To do that, access the Wallet page using the menu at the top:

Then, click on the Metamask icon beside the token that you want to add to Metamask:
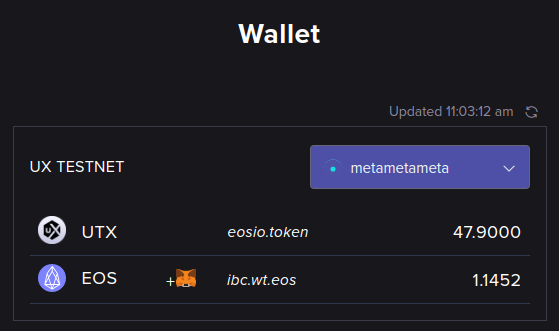
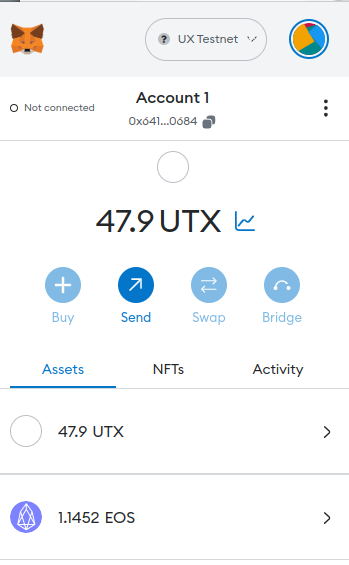
Metamask should pop up and ask you to confirm the addition of the token. Accept it and you will be able to see its balance in Metamask:
Use UtilityX with Metamask
As you browse UtilityX while logged in with Metamask, advanced features will be disabled. However, you will still be able to, for example, use the UtilityX AMM (Automated Market Maker) to perform swaps.
Once you find an UtilityX feature that is available to you, use the menu on the left of this guide to jump to the relevant section and learn how to use it.
NOTE: In the near future, there will be a way for you to export your UX Network's Ethereum private key from Metamask, and import it directly into an Antelope-native wallet such as Anchor. When you do that, you will be able to log in to UtilityX, with the same UX Network account that you were previously controlling through Metamask, using e.g. the Anchor wallet. And that will unlock all of the advanced UtilityX features for you.